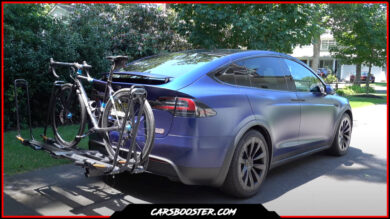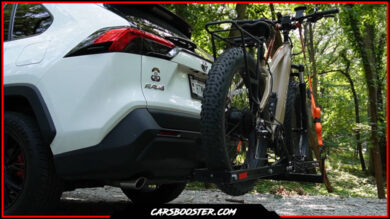
Looking to take your cycling adventures to the next level? A hitch bike rack is a great investment that will allow you to transport your bikes with ease. However, installing a hitch bike rack on a car can be a bit daunting, especially if you’ve never done it before.
In this article, we’ll guide you through the process step-by-step on how to install hitch bike rack properly and securely, so you can hit the road with confidence.
By the end of this article, you should have all the proper information and knowledge enabling you to install your hitch bike rack on your car on your own.
Choose the Right Bike Rack
Before you begin hitch bike rack installation, you must first select the appropriate model for your vehicle and bike.
When choosing a bike rack, consider the following:
- The make and model of your car
- The number of bikes you want to transport
- Your bike type (e.g., road bike, mountain bike, fat bike)
- The weight of your bikes
When you’ve decided on the best bike rack for your needs, it’s time to mount it on your vehicle.
Prepare Your Car
Before you start assembling the bike rack, you need to prepare your car. This means cleaning the area where the bike rack will be installed and making sure there are no obstructions. You’ll also need to make sure your car has a hitch receiver. If your vehicle does not already have a hitch receiver, you will need to have one fitted.
To prepare your car:
- Clean the area where the bike rack will be installed.
- Check for any obstructions such as a bumper or an exhaust pipe.
- Check that your car has a hitch receiver. If not, get one installed.
- Make sure your car can support the weight of the bike rack and bikes.
You may begin assembling the bike rack once your car is ready.
Assemble the Bike Rack
Check that you have all of the essential parts and tools before assembling the bike rack. Read the instructions attentively and step by step.
Some bike racks may require additional assembly, such as attaching the arms or trays. Make sure you assemble the bike rack properly to ensure it’s secure and stable.
To assemble the bike rack:
- Gather all the necessary parts and tools.
- Read the instructions carefully.
- Follow the instructions step-by-step.
- Make sure the bike rack is securely and stably assembled.
Once the bike rack is assembled, you’re ready to position it on your car.
Position the Bike Rack
Positioning the bike rack on your car is critical for safe and secure transportation of your bike. The bike rack should be level and stable, and the bikes should be positioned in a way that won’t damage your car or the bikes themselves. Make sure you position the bike rack correctly before securing it to your car.
To position the bike rack:
- Place the bike rack in the hitch receiver.
- Make sure the bike rack is level and stable.
- Adjust the bike rack to the correct height.
- Position the bikes in a way that won’t damage your car or the bikes themselves.
Once the bike rack is positioned, you need to maintain proper spacing between the bikes and the car.
Maintain Proper Spacing
Maintaining proper spacing between the bikes and the car is essential for safe transportation. The bikes should not be too close to the car, as they could scratch or damage the car’s paint. They should also not be too far away from the car, as this could cause instability during transportation.
To maintain proper spacing:
- Make sure there is enough space between the bikes and the car.
- Use straps or bungee cords to secure the bikes in place.
- Make sure the bikes are level and stable.
- Double-check the spacing before securing the bike rack to the car.
Once you’ve maintained proper spacing, you can secure the bike rack to your car.
Secure the Bike Rack to the Car
Securing the bike rack to your car is the final step in the installation process. This ensures that the bike rack and bikes are safely and securely attached to your car. Make sure you follow the instructions carefully and check that the bike rack is tightly secured before driving.
To secure the bike rack to your car:
- Use the locking mechanism to secure the bike rack to the hitch receiver.
- Make sure the bike rack is tightly secured to the hitch receiver.
- Double-check the bike rack for any loose parts or screws.
- Check that the bikes are securely attached to the bike rack.
You may fasten your bike to the rack after it is properly secured.
Attach the Bike to the Rack
The final step before hitting the road is to secure your bike to the bike rack. Before driving, make sure you carefully follow the instructions and that your bike is properly fastened.
To attach your bike to the bike rack:
- Place your bike in the designated area on the bike rack.
- Use straps or bungee cords to secure the bike to the rack.
- Make sure the bike is level and stable.
- Double-check the bike for any loose parts or screws.
You’re ready to go after your bike is securely connected to the bike rack!
Check and Adjust the Bike Rack
Before you start driving, it’s important to check the bike rack and make any necessary adjustments. This guarantees that the bike rack and bikes are firmly secured and will not damage your vehicle or other cars on the road.
To check and adjust the bike rack:
- Check that the bike rack is level and stable.
- Double-check the spacing between the bikes and the car.
- Make sure the bikes are securely attached to the bike rack.
- Check for any loose parts or screws.
After you’ve checked and adjusted the bike rack, you’re ready to go, your bike safely and securely placed on your car.
FAQs
Can I install a bike rack on my car myself?
Yes, if you have the necessary equipment and carefully follow the directions, you can install a bike rack on your own.
How do I choose the right bike rack for my car?
When choosing a bike rack, consider the make and model of your car, the number of bikes you want to transport, the type of bikes you have, and the weight of your bikes.
Can I use a bike rack on a rental car?
It depends on the rental car company’s policy. Some rental car companies allow bike racks, while others do not. Check with the rental car company before installing a bike rack on a rental car.
Conclusion: How to Install Hitch Bike Rack Probably?
Installing a bike rack on your car may look hard but with the right tools and a little know-how, you can do it yourself.
You may carry your bike safely and securely on the road by selecting the suitable bike rack, prepping your car, assembling the bike rack, placing it correctly, keeping adequate spacing, fastening it to your car, attaching your bike, and inspecting and adjusting the bike rack. So get out there and have fun!


