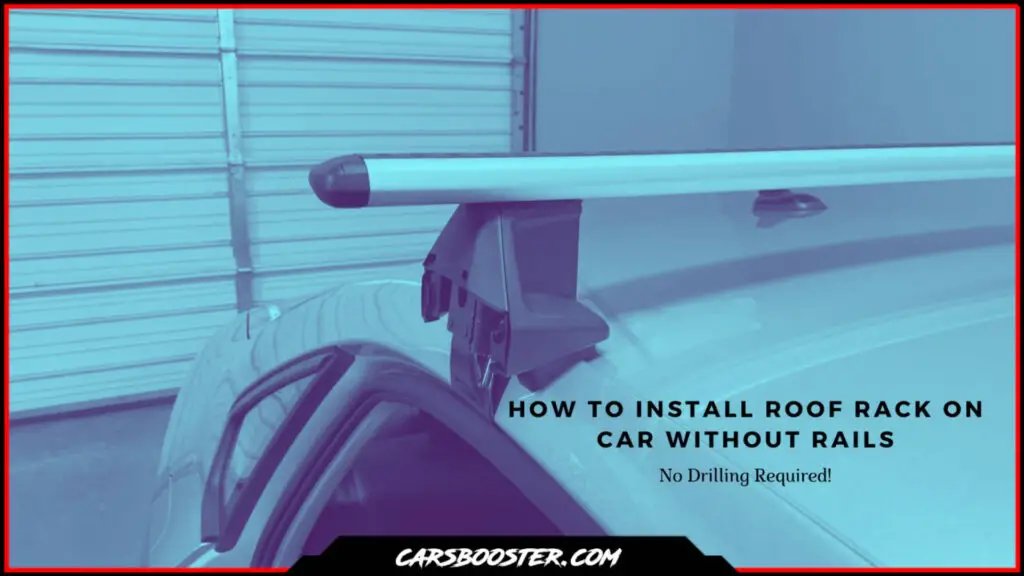
If you plan to travel by car and want to bring along plenty of belongings, having extra room on your roof could come in very handy. Fortunately, adding a roof rack is a simple way to increase storage capacity, but what do you do if your car lacks pre-installed railings? Luckily we will show you how to install roof rack on car without rails.
This article will provide a detailed guide on installing a roof rack onto a car without any existing rails. By following these steps, you’ll be able to safely and securely attach items like bicycles or kayaks to your vehicle for outdoor adventures.
In short: installing a roof rack on car without rails is simple if you follow the steps in this guide, so make sure to go through them all.
How to Install Roof Rack On Bare Roof?
Let’s talk about a few safety concerns before we begin. First, ensure sure your vehicle has a reliable roof rack that can support the weight of your equipment. Second, always follow the manufacturer’s instructions carefully. And finally, double-check that the roof rack is securely attached before hitting the road.
Gather Materials and Tools
Make sure you have every tool and item needed to finish the job before starting. Double-check that you have all the necessary materials and equipment ready at hand. Here’s what you’ll need:
- A roof rack kit designed for cars without rails
- Measuring tape
- Marker or chalk
- Socket wrench
- Adjustable wrench
Once you have everything you need, it’s time to measure your car’s roof.
Measure Your Car’s Roof
The first step in installing a roof rack on bare roof is to measure your car’s roof. This will help you position the roof rack correctly. Here’s how to do it:
- From one side to the other, measure your car’s roof’s length.
- Mark the center point of your car’s roof with a marker or chalk.
- Measure the width of your car’s roof from one end to another, taking note of the distance between the middle point (centerline) of the roof and its edges.
- Record these measurements for later reference.
It is now time to place the roof rack on top of your car using the measurements you just took.
Position the Roof Rack
Most roof rack kits come with feet that attach directly to your car’s roof. To position the roof rack correctly, follow these steps:
- Use the measurements you took previously to properly position the roof rack feet on your car’s roof.
- Make sure the feet are evenly spaced and aligned with the center point of your car’s roof.
- Adjust the feet until they fit snugly against your car’s roof.
Once you’ve positioned the roof rack feet, it’s time to attach them.
Attach the Roof Rack Feet
The next step is to attach the roof rack feet to your car’s roof. Here’s how to do it:
- Use a socket wrench to tighten the bolts that secure the feet to your car’s roof.
- Make sure the feet are securely attached and don’t move around.
Now that the feet are attached, it’s time to adjust the crossbars.
Adjust the Crossbars
Most roof rack kits come with adjustable crossbars that can be moved to fit your gear. Here’s how to adjust them:
- Loosen the bolts on the crossbars with an adjustable wrench.
- Move the crossbars to the desired position.
- Tighten the bolts to secure the crossbars in place.
Now that the crossbars are adjusted, it’s time to secure them to the feet.
Secure the Crossbars to the Feet
The final step in installing a roof rack is to secure the crossbars to the feet. Here’s how to do it:
- Slide the crossbars into the slots on the feet.
- Use a socket wrench to tighten the bolts that secure the crossbars to the feet.
- Make sure the crossbars are securely attached and don’t move around.
Now that your roof rack is installed, it’s time to add accessories.
Add Accessories to the Crossbars
Once your roof rack is installed, you can add accessories like bike racks, cargo boxes, or kayak mounts. Simply attach the accessory to the crossbars according to the manufacturer’s instructions.
Before you hit the road, it’s important to check the alignment of your roof rack.
Check the Roof Rack Alignment
Verify the alignment of your roof rack before you go on the road. Here’s how to do it:
- Make sure the roof rack is straight and centered by stepping back and looking at your car.
- Check that the crossbars are level and evenly spaced.
- Make any necessary adjustments to ensure the roof rack is aligned correctly.
Now that your roof rack is installed and aligned, it’s time to test it out.
Testing Your Installation
Before you hit the road, it’s important to test your roof rack installation. Here’s how to do it:
- Add some weight to your roof rack, such as a small bag or box.
- Check that the roof rack is securely attached and doesn’t move around.
- Drive around the block to make sure the roof rack is stable and doesn’t make any noise.
If everything appears to be in order, you can now go on the highway.
Final Tips and Safety Considerations
Here are a few last safety advice and considerations before we move on:
- Always pay close attention to the manufacturer’s instructions.
- Make sure the roof rack is securely attached before hitting the road.
- Double-check that the roof rack can handle the weight of your gear.
- Don’t exceed the weight limit of your roof rack.
- Check the alignment of your roof rack regularly.
You may have a safe and stress-free road trip by complying with these safety recommendations and guidelines.
FAQs on How to Mount Roof Rack on Car Without Roof Rails
Can I install a roof rack on a car with a sunroof?
Yes, you can install a roof rack on a car with a sunroof. Just make sure the roof rack feet don’t interfere with the sunroof when it’s open.
Can I remove my roof rack when I’m not using it?
Yes, it is possible to remove the roof rack if needed. When it is not being used, ensure that you store it away properly to prevent damage or loss.
Can I install a roof rack myself?
Yes, you can install a roof rack yourself. Be certain to diligently review and apply the manufacturing directions supplied with the product.
Conclusion: How to Install Roof Rack on Bare Roof?
Putting a roof rack on a vehicle lacking built-in roof rails may initially appear overwhelming. Nonetheless, by closely adhering to the provided guidelines and exercising caution, anyone can enjoy a trouble-free vacation with all their essential gear.


