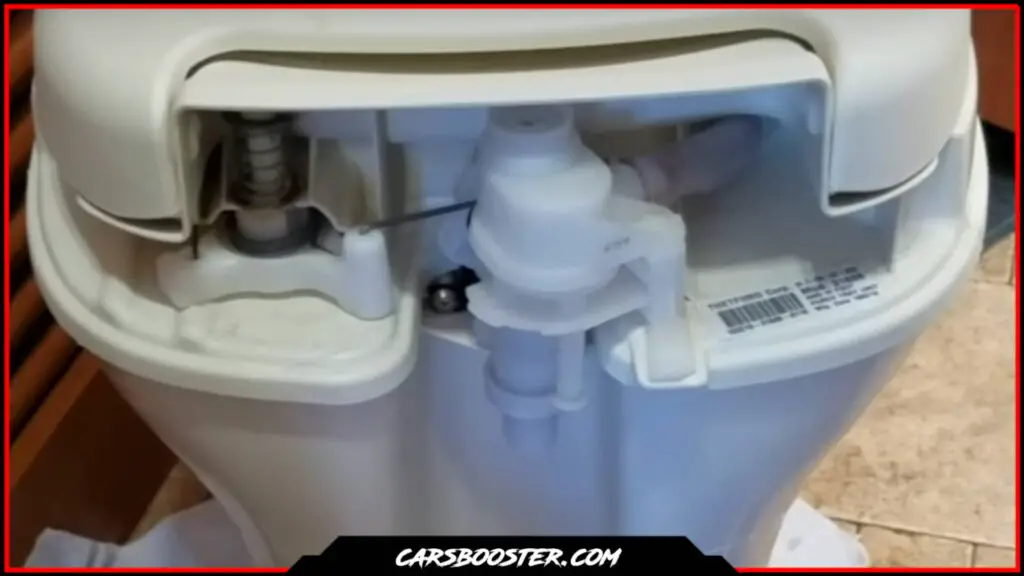
Are you tired of struggling with a stubborn RV toilet valve that refuses to flush properly? Don’t let a faulty valve ruin your next road trip! It’s time to take matters into your own hands and learn how to fix your RV toilet valve!
An RV toilet valve malfunction can be a real headache. But worry not because fixing it doesn’t have to be a hassle. With this how-to guide article at hand you can learn a few quick steps to get your bathroom running smoothly once again. So gather your tools and lets begin!
At the end of this article, you should have the proper knowledge enabling you to efficiently fix an RV toilet valve by yourself using the tools we will be mentioning later on.
What Is RV Toilet Valve?
An RV toilet valve is a device that controls the flow of water and waste in a recreational vehicle’s toilet system.
The RV toilet valve serves a vital role in allowing water to enter the bowl and waste to exit into the holding tank.
Selecting a high-quality one tailored to your specific needs is imperative. A remarkable valve should be effortless to use, easy to clean, and trustworthy.
A premium RV toilet valve should also be able to handle the type of waste that you need to dispose of, whether that’s solid waste, liquid waste, or both.
What Are The RV toilet Valves Common Types?
There are several types of toilet valve systems that are commonly used in recreational vehicles (RVs). These include:
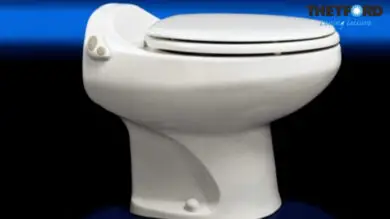
- Gravity Flush: This is the most basic type of toilet valve system and is typically found in older RVs. It relies on the weight of the water in the tank to push waste down through the valve and into the holding tank, such as the Thetford RV toilet valve.
- Pressure-Assisted Flush: This type of toilet valve uses pressurized air in the tank to help push waste through the valve and into the holding tank. It is more powerful than a gravity flush and requires less water to operate.
- Macerating Flush: This type of toilet valve uses a small electric motor and a series of blades to grind up waste before flushing it through the valve and into the holding tank. In case there’s a considerable gap between the toilet and the holding tank, lessening the quantity of waste to transport is an advantage.
- Vacuum Flush: This type of toilet valve uses a vacuum to pull waste through the valve and into the holding tank. It is similar to a macerating flush, but it uses suction rather than grinding blades to break up the waste.
Choosing an appropriate RV toilet valve warrants attention to specific features that align with your needs. The primary aspect to contemplate is matching the capacity of your holding tank with a compatible valve system; this guarantees effective waste disposal without blockages or overflow concerns.
Secondly, assess whether or not you have ample water supply to meet flushing requirements so as not to compromise optimal functionality levels. Lastly, consider which type(s) of waste byproducts will be generated from daily bathroom use and select a valve mechanism accordingly to ensure proper disposal management.
How To Maintain An RV Toilet Valve?
RV toilet valves are typically designed to be easy to use and maintain, with a simple mechanism for opening and closing the valve.
It’s important to properly maintain your RV toilet valve to ensure that it functions properly and does not create any health or safety hazards.
If you notice any problems with your RV toilet valve, it’s important to address them promptly to prevent any further issues.
Here are some tips for maintaining your RV toilet valve:
- Follow the manufacturer’s instructions: Be sure to read and follow the manufacturer’s instructions for your specific RV toilet valve. These instructions will include important information on how to use and maintain the valve.
- Clean the valve regularly: Over time, dirt and debris can accumulate on the valve, which can cause it to malfunction. Regularly clean the valve and surrounding area to keep it in good working order.
- Check for leaks: Inspect the valve and its connections regularly for any leaks. If you find a leak, be sure to fix it promptly to prevent damage to the RV.
- Replace the valve if necessary: If the valve is damaged or not functioning properly, it may need to be replaced.
By following these tips, you can help ensure that your RV toilet valve is well-maintained and ready for your next adventure.
What To Do If RV Toilet Valve Stuck Closed?
If your RV toilet valve is stuck closed, it can be frustrating and inconvenient. There are a few different things you can try to fix the problem:
- Check the flapper: The flapper is a rubber valve that sits in the bottom of the toilet tank and opens and closes to allow water to flow through the valve and into the bowl. If the flapper is stuck closed, it can prevent the toilet from flushing properly. To fix this, you can try gently prying the flapper open with a flat object, like a spoon or a butter knife.
- Check the chain: The chain is attached to the flapper and is used to open and close it. If the chain is too short, it can prevent the flapper from opening fully, which can cause the toilet to become stuck. To fix this, you can try adjusting the length of the chain.
- Check the valve: If the problem isn’t with the flapper or the chain, it may be with the valve itself. If the valve is stuck closed, you may need to disassemble it and clean it to get it working properly again.
If none of these solutions work, it may be a faulty RV toilet Valve, next we help you to figure out how to fix it.
How To Fix RV Toilet Valve?
If the RV toilet valve is stuck closed or is not functioning properly, there are a few steps you can try to fix it. Here is How to repair the RV toilet valve:
Identify the problem
Identify the problem with the valve. Is it leaking, not shutting correctly, or failing to open as needed? Pinpointing the exact issue can aid in finding the optimal resolution.
Clean the valve
Start by grabbing some mildly cleansing solution and a brush to clean the valve thoroughly along with its immediate environment. Finally, flush your toilet multiple times to make sure no dirt or debris remains.
Check the connections
Make sure all connections to the valve are tight and secure. Loose connections can cause the valve to malfunction.
Replace the valve if necessary
Should the valve exhibit poor performance or damage despite cleaning and connection verification, a replacement may be necessary. We’ll explore this further in upcoming paragraphs.
After following those steps, you may be able to fix your RV toilet valve and restore it to proper functioning.
How To Change RV Toilet Valve
What if your RV toilet valve is beyond fixing, then the solution would be to change it. Here are the steps for an RV toilet valve replacement:
- Gather the necessary tools: You will need a wrench, a replacement valve, and any other tools recommended by the manufacturer.
- Shut off the water supply: Before beginning the repair, be sure to shut off the water supply to the toilet. This will prevent any water from flowing through the valve while you work.
- Remove the old valve: Using a wrench, loosen the bolts or screws that hold the old valve in place. Then, carefully remove the valve from the toilet.
- Install the new valve: Follow the manufacturer’s instructions for installing the new valve. Be sure to use the recommended parts and tools, and tighten any bolts or screws securely.
- Test the valve: Once the new valve is installed, turn the water supply back on and test the valve to ensure it is functioning properly.
By going through these steps, you should know how to replace RV toilet valve safely and effectively.
Conclusion
RV toilet valves are an essential component of any recreational vehicle’s bathroom system. Unfortunately, they can sometimes become stuck or malfunction, causing frustration and inconvenience.
This article presents a comprehensive guide that breaks down the process into simple steps allowing even novices to diagnose and sort out typical valve concerns effortlessly. No matter how daunting the problem may seem you’ll be well equipped to tackle it.
Whether you need to fix a stuck flapper, adjust the chain, clear a clogged valve, or replace a faulty valve, we’ve got you covered. Don’t let bathroom breaks ruin your RV trip. With the proper tools and some basic understanding, you can ensure a relaxed pit stop experience.
To ensure safe and efficient operation it’s imperative to follow the manufacturer’s guidelines when changing a valve and use only suggested parts. If there is any uncertainty about accomplishing this repair independently it may be wise to consider seeking the aid of a professional.
For the overall aspects regarding the best RV toilets out there, check our articles 5 Best RV Toilets Available In The Market, and 5 Best Low Profile RV toilets Worth Checking In 2023.
In the end, we hope that our article introduced some kind of help and knowledge in your pursuit of obtaining the best experience possible. If so feel free to share it as sharing motivates us to produce more content.
